2026 Battery Ready Homes: Pre Wiring Rules Explained
Imagine cooking dinner during a power outage, with a dark kitchen and a refrigerator full of groceries. A battery system could keep essential circuits running, yet the installation becomes far easier when your home is prepared before the equipment arrives. Homeowners save money simply by planning conduit routes, panel space, and backup circuits early.
A battery ready home includes the wiring paths and electrical capacity needed for future energy storage. You may not install a battery right away. Still, thoughtful preparation can reduce wall opening, shorten installation work, and make your system easier to expand.
What Battery Ready Really Means
Battery readiness does not always mean buying a battery or installing every component at once. It usually means preparing the home for a permitted energy storage system that connects with solar panels, the utility supply, or both.
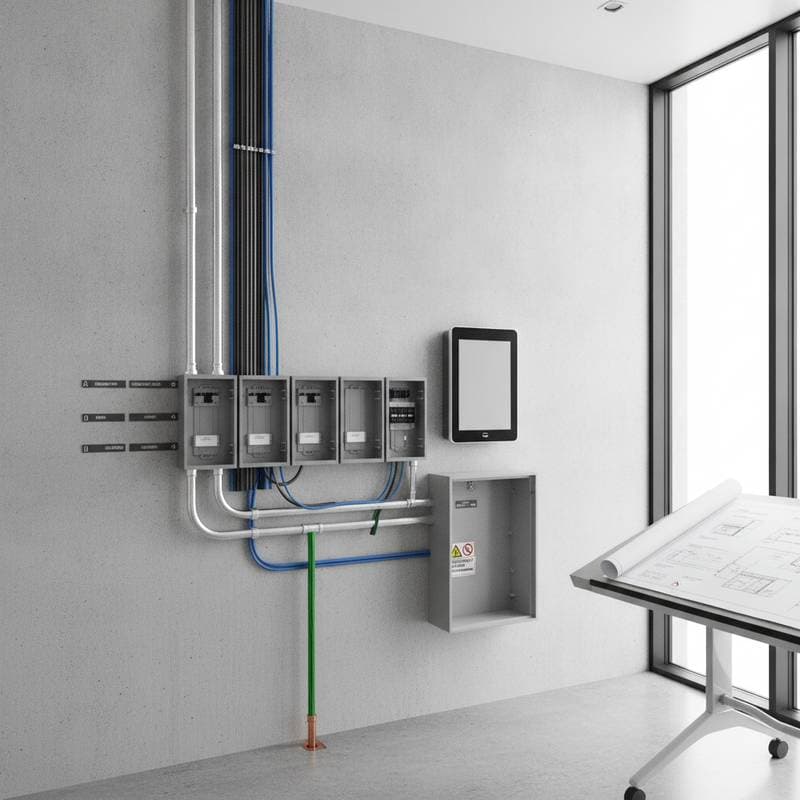
Your electrician may prepare space for a battery and required clearance. They may also install conduit from the electrical panel to the future battery location. A suitable main service panel or load center becomes essential. Wiring for selected backup circuits, communication pathways for monitoring equipment, grounding and bonding provisions, and access for disconnects and emergency shutoff equipment complete the preparation.
Rules differ between states, cities, utilities, and building departments. Local fire access requirements also affect where batteries can sit. Ask a licensed electrician to review the current requirements for your property instead of relying on a generic online diagram.
Start With Your Backup Priorities
The first design question is not where the battery will go. It is what you want powered when the grid fails.
A small battery may support a refrigerator, internet equipment, lights, garage door opener, medical equipment, and a few outlets. A larger installation may handle heating, cooling, cooking, or water heating, though those loads can require substantial capacity.
Make two lists. Essential circuits include refrigeration, lighting, security, communication, and medical devices. Convenience circuits include laundry equipment, electric ovens, hot tubs, and whole house cooling.
Your electrician can create a backed up loads panel or design a system that manages selected circuits automatically. Separating these loads often keeps the project practical and prevents an undersized battery from shutting down under heavy demand.
Plan the Battery Location Carefully
Battery placement affects wiring length, access, ventilation, weather protection, and fire safety. Common locations include garages, exterior walls, utility rooms, and dedicated equipment areas.
Avoid treating an empty corner as an automatic solution. The location may need clear space around the equipment, protection from vehicle damage, and a suitable distance from doors, windows, vents, and combustible storage. Indoor installations can require extra review, especially in compact utility rooms.
A good location should offer a short, direct conduit route. It needs a firm wall or approved mounting surface. Protection from flooding and extreme heat matters. Clear access for inspection and servicing and room for future equipment or expansion complete the requirements.
One homeowner planned a garage installation where the best wall was hidden behind stacked storage bins. Moving those bins early saved a great deal of frustration when the electrician returned.
Pre Wiring the Electrical Path
The conduit route is one of the most valuable parts of battery preparation. It may run from the main panel to the planned battery position, then continue toward solar equipment or a backup loads panel.
Use appropriately sized conduit and leave room for the conductors required by the selected system. The exact size depends on the battery model, distance, voltage, local code, and future expansion plans. Oversized conduit can be a smart investment when walls are open, since replacing it later may require demolition.
Ask your electrician to label both ends of every pathway. A clear label such as future energy storage helps future contractors understand what was installed and why. Photograph the route before drywall closes, then store the images with your home records.
Do not pull random wire into an unfinished conduit and assume it will suit every battery. Equipment specifications change, and conductors must match the final design.
Check Your Main Panel and Service
Older panels may not have enough breaker space, bus capacity, or service capacity for a battery system. A battery ready plan should include a panel assessment, not just a pipe running through the wall.
Your electrician may recommend a larger service panel. They may also suggest a backup loads panel, a main panel upgrade, load management equipment, a solar and storage compatible inverter, or relocated circuits to create usable space.
Load calculations matter. Adding storage does not automatically mean your home can support every large appliance at once. Electric vehicle charging, heat pumps, induction cooking, and electric water heating can all affect the design.
Budget for Preparation
Pre wiring costs depend on access, conduit length, panel changes, permits, and the amount of wall repair. A straightforward conduit installation may cost about 500 to 1500 dollars. A new panel, backup loads panel, or service upgrade can bring preparation into the 2000 to 6000 dollar range before battery equipment is purchased.
Request an itemized quote that separates electrical preparation, permit and inspection fees, panel or service work, drywall repair and painting, battery equipment, and future installation labor.
Local electrical contractors, solar companies, and utility rebate programs can help clarify eligible equipment and inspection steps. Brands such as Enphase, Tesla, FranklinWH, and SolarEdge are widely discussed, but the best choice depends on local installer support, warranty service, and compatibility with your solar system.
Build a Clear Installation Plan
A practical pre wiring plan should show the panel, battery location, conduit route, backup circuits, disconnects, and future solar equipment. Keep the approved drawings, product information, inspection records, and photographs together.
Pull the required permits. Follow local electrical and fire requirements. Label circuits and conduits clearly. Protect wiring from impact and moisture. Test the prepared circuits. Explain what remains unfinished until the battery is installed.
Next Steps for Your Property
Schedule an assessment with a licensed electrician who understands local permitting requirements. Review your electrical panel capacity and identify the circuits you want protected during outages. Document your preparation plans and keep all records accessible for future installation work.